Celebrating the #QueensBirthday with Dr.Oetker

With the Queen turning the ripe old age of 90 this year there are various celebrations and special events going on left, right and centre. I was recently invited to take part in one with Dr.Oetker and having just about recovered from the Bunny Bums incident decided to hop on board.

Dr.Oetker have teamed up with baking expert Juliet Sear to create a rather magnificent NINE tier cake encompassing union jacks, the Queen’s crown, bunting and of course corgis.

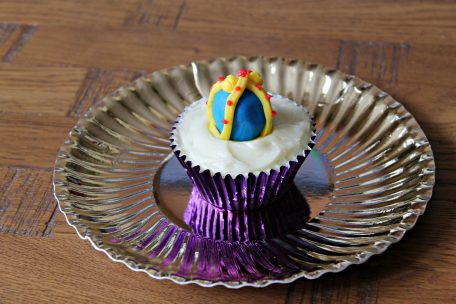
Impressive, right? For those of us at home who love to bake but don’t quite feel up to the nine tier challenge the team at Dr.Oetker have come up with a regal themed cupcake recipe for us to bake instead…I was asked to have a go at baking the recipe but adding my own little hacks to put a different spin on things. Now, the recipe calls for fondant work which I am no expert at so before I pop up my attempt at the cakes and decoration here’s what they *should* look like!
Yeah, as you’ll see my skills aren’t quite as refined but I gave it my best shot! First up, here’s the recipe for the Strawberry and cream Royal Cupcakes (with my hacks in brackets).
Ingredients
For the cupcakes:

10 x cupcake cases
75g/3oz baking margarine
75g/30z caster sugar
1 large egg
1/2 tsp Dr.Oetker madagascan vanilla extract
75g/3oz self raising flour
100g/3.5oz soft set strawberry jam (I opted for lemon curd here for a citrus kick)

To decorate:

Dr.Oetker coloured ready to roll regal-ice
Dr.Oetker bright writing icing
225ml/8oz double cream (I made a simple lemon buttercream instead in keeping with my citrus theme)

Preparation:

Preheat the oven to 190˚C (170˚C fan assisted oven, 375˚F, gas mark 5). Put the Baking Cases in 10 fairy cake tins. Put the margarine in a mixing bowl with the caster sugar, egg and Vanilla. Sift the flour on top and using an electric whisk on a low speed, gently whisk the ingredients together.

Increase the speed and whisk for a few seconds until well blended and creamy. Divide the mixture equally between the cake cases and smooth over the tops. Bake for 16 -18 minutes until risen and lightly golden. Transfer to a wire rack to cool completely.

Using a teaspoon, scoop out a neat portion of sponge from the centre of each cake and fill with jam. Press the cut out sponge back on top to seal in the jam. Set aside.

To decorate, gently knead the red and blue Ready to Roll icing separately to make pliable, then cut each into 5 pieces. Form each into a ball. Cut a deep cross in the top of each and roll the base of each ball between your fingers to make it narrower than the top – they should look like tiny chefs’ hats.

Knead 50g (2oz) of the yellow Icing to soften. Lightly dust the work surface with a little icing sugar then roll out the yellow icing thinly to form a rectangle approx. 8 x 15cm (3 x 7 inch). Cut 30 thin strips, approx. 0.5cm (1/4 inch) wide – you will need 3 for each crown. Cross 2 strips across each ball and stick in place using a little water. Trim at the base if necessary, then press down on the top of each to make an indent in the top.

Secure another strip around the bottom of each, and trim as necessary. Gather up the trimmings and make small balls to decorate the top if the crowns, sticking them in place with a little water. Pipe Writing Icing dots on each to resemble jewels. Leave aside on a board lined with baking parchment until ready to serve.

Just before serving, whip the cream until firm enough to pipe and spoon into a piping bag fitted with a large closed star nozzle. Pipe a generous swirl on top of each cake and top with a crown. Your cakes are ready to serve and enjoy, and fit for The Queen!

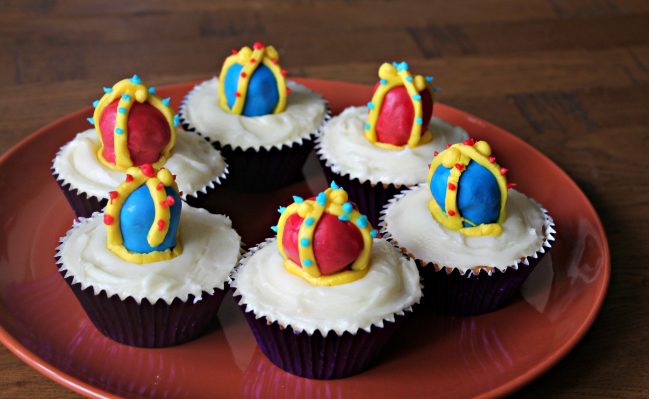
And my cakes?
If you squint they don’t look too amateur! Let me know if you make these and we can compare!

Excitingly Dr.Oetker are also holding a competition where you can win one of FIVE four tiered versions of the Queen’s cake. To enter simply click on this link and get sharing how you’ll be celebrating. Whilst I’m at it I thought I’d share a couple of quick tips for hosting a party if that’s the route you go down…

1. Keep it Simple! No-one wants a fancy six course meal, stick to good old fashioned buffet style food (and get people to bring a dish with them). Nothing unites people more than bonding over cheese sandwiches and chocolate fingers!

2. Get Crafty! Decorating for a party needn’t be expensive, turn scraps of fabric in to bunting or dig out some old wool and make pom poms to hang everywhere. Cheap, cheerful and fun to do.

3. Save on Washing up by using paper plates and plastic cups/cutlery. Everyone’s exhausted after a good knees up and facing mountains of washing up will be a drag. Use disposable everything where possible and save precious time and energy for the celebrations.

What are your plans and tips?

end

Baking Bunny Bums with Dr. Oetker

Easter is rapidly approaching and to celebrate the occasion Dr. Oetker is celebrating with bums, bunny bums to be more precise. If you’re in London or Manchester you might have noticed the arrival of a 7ft giant bunny bum constructed of over 3,000 bars of Fine Cooks’ chocolate- something I’m pretty upset I missed to be honest. Still, when given the opportunity to create my own mini bunny bum structures I didn’t feel too upset and hopped to it sharpish.
Armed with the Bunny Bum recipe, an envelope full of the key ingredients and instructions to come up with a hack for the recipe it was great to have an excuse to get in to the kitchen and become knee deep in flour once more (and trust me, things did get messy!)
I’ve popped the recipe below, including my little hack so do make sure you let me know if you have a go at making these cheeky cupcakes and if you decided to change things up a bit.
Ingredients:

For the cupcakes:
Dr. Oetker Muffin Cases (x12 cases)
125 g Margarine (4 1/2 oz of baking margarine, softened)
125 g Caster Sugar (4 1/2 oz)
Large Eggs (x2)
125 g Plain Flour (4 1/2 oz)
Dr. Oetker Fine Dark Cocoa Powder (x1 sachet or 25g/1oz)
Dr. Oetker Baking Powder Sachets (x2 sachets/10g or 1oz)
1tsp liquorice powder*


To decorate:

200 g Dr. Oetker Fine Cooks’ Milk Chocolate (7oz)
15 g Dr. Oetker White Chocolate Chips (1/2 oz)
130 g Dr. Oetker Liquid Glucose
125 g Unsalted Butter (4 1/2 oz, softened)
225 g Icing Sugar (8oz)
2 ½ ml Dr. Oetker Madagascan Vanilla Extract (1/2 tsp)
Dr. Oetker Lime Green Gel Food Colour (x1 tube)

To make:

Preheat the oven to 180˚C (160˚C fan assisted oven, 350˚F, gas mark 4). Put the Muffin Cases in 12 muffin tins. Put the margarine in a mixing bowl, add the caster sugar and eggs. Sift the flour, Cocoa and Baking Powder on top and using an electric whisk on a low speed, gently blend the ingredients together. Increase the mixer speed and whisk for a few more seconds until well mixed.

Divide the mixture equally between the cases and smooth over the tops. Bake for about 25 minutes until risen and just firm to the touch. Transfer to a wire rack to cool.

To decorate, break up the Milk Chocolate into pieces and place in a heatproof bowl over a saucepan of barely simmering water, and leave to melt. Remove from the water and stir in 125g (4 ½ oz) Liquid Glucose to form a thick paste. Scrape on to a piece of baking parchment and leave to cool – the mixture will become firm and pliable when cold. Avoid prolonged chilling as the paste will become too hard to mould.

Set aside 12 White Chocolate Chips. Put the rest of the Chips in a small heatproof bowl and melt as above. Mix in 5 g (1 tsp) Liquid Glucose. Leave to cool as above.

Meanwhile, put the butter in a bowl and beat until smooth and glossy. Gradually sift and beat in all the icing sugar until creamy and soft and add Vanilla Extract. Mix in the whole tube of Green Gel Food Colour. Thickly spread the icing on top of each cup cake, right to the edge.

Divide the Milk Chocolate paste into 13 equal pieces, and form 12 portions into balls. Place a ball on top of each iced cake. Use the remaining portion of paste to make 12 pairs of bunny feet and leave aside on baking parchment.

Divide the White Chocolate paste into 12 equal portions. Use to make 12 pairs of foot pads and press gently onto the feet. Score bunny toes with a small knife, then gently press onto the sides of the bunny bodies. Top each bunny body with one of the reserved White Chocolate Chips as a tail. Your cupcakes are now ready to serve and enjoy!

Note: if the moulding paste becomes too hard to work with, you can pop it in the microwave for 5-10 seconds to soften it up again.

Now my hack might not sound like much but the addition of liquorice powder to a chocolate sponge is something of a revelation. It doesn’t matter if you’re not a huge fan of liquorice, it doesn’t add a really strong flavour, more of a subtle kick that enhances the flavour and stops the super sweet icing being too overpowering. You’ll just have to trust me on this one (and do ask about the blackcurrant and liquorice cake I made recently!).

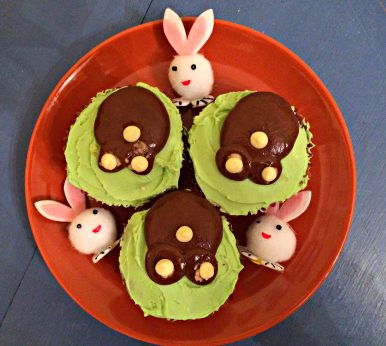
As for the end result, well, I’m no artist and I did find the chocolate paste a little hard to work with- I think because my kitchen gets really hot it didn’t set as well as it should and I kind of ended up with puddle like bunny bums, but I salvaged the best three to show you the general idea…

Ah well, looks aren’t everything right?

end

Baking: Earl Grey Tea Loaf

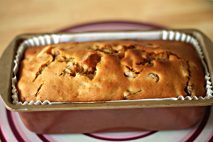
It’s been a while since I’ve popped up a baking post on the blog eh? For a while life got in the way and when I did bake it was the same old things. Since I’ve had some down time lately I’ve rediscovered my love of trying new things in the kitchen and when Dr. Oetker got in touch with a selection of low fat recipes they had added to their site and the offer to send me some of the key ingredients to make them with, I couldn’t resist branching out.
For my first creation I decided to try out the Earl Grey Tea Loaf as it combines three of my favourite things- tea, apricots and cake!
For the cake you will need:

– 500g (1lb 2oz) dried apricots

– 200g (7oz) light brown sugar

– 300ml Earl Grey Tea (cold)

– 1 x Egg (beaten)

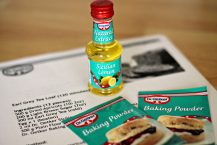
– 2ml Dr. Oetker Sicilian Lemon Extract* (2-3 drops)

– 300g (10oz) plain flour

Dr. Oetker Baking Powder Sachets x 2*

Method:

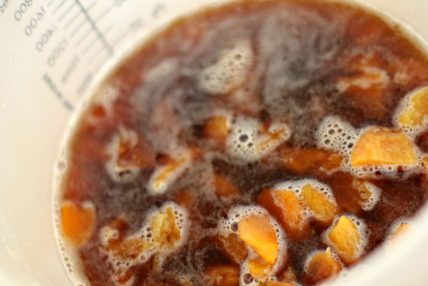
1. Place the apricots, sugar and tea in a bowl. Mix well, cover and leave to stand in a cool place for about 3 hours until the apricots have plumped up a bit.

2. Preheat the oven to 170°C (150°C Fan, Gas Mark 3). Grease and line a 900g (2lb) loaf tin.

3. Mix the egg and Natural Sicilian Lemon Extract into the soaked fruit and tea. Gradually sift the flour and Baking Powder over the fruit, carefully folding in after each addition, until well incorporated.

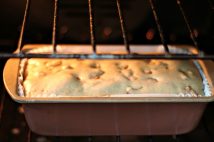
4. Spoon into the prepared tin, smooth over the top and bake in the oven for about 1 hour until risen and lightly golden, and a skewer inserted into the centre comes out clean. Stand for 10 minutes before turning on to a wire rack to cool completely.

5. When cold, wrap well and store for 24 hours before slicing thinly, using a bread knife, to serve spread with low fat soft cheese and your favourite jam (or go wild and smother it in real butter, yum!)

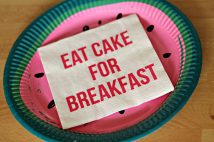
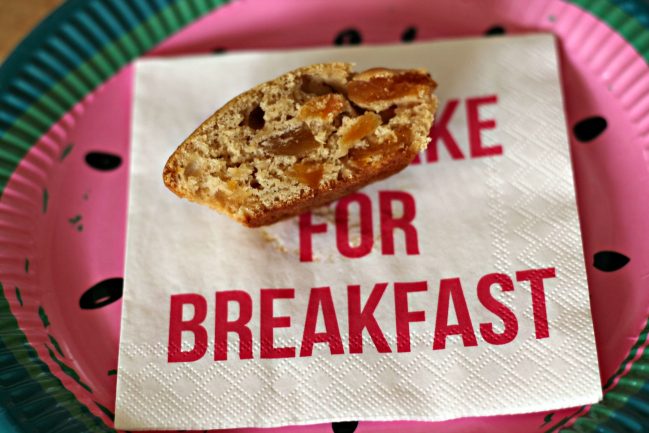
How cute are the paper plates and napkins I picked up in Tesco, too? I can’t resist pretty tableware, even if it isn’t exactly required and I am running out of places to store it.

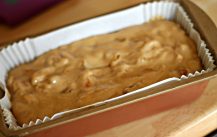
This loaf is one of my all time favourite things I’ve baked, the flavours of the apricots and tea work perfectly and it’s really lovely warm from the oven (what was that about storing it for 24 hours?)

Let me know if you give this a try, I reckon it could work well with some other dried fruits too.

end

Wimbledon ready with Lambrini

It’s Wimbledon time again! It’s probably the only time of year where I’ll embrace sitting down and watching sport on TV aside from the odd football match under duress so when the folks at Lambrini got in touch to say they had a celebratory cocktail at the ready, perfect for sitting back and relaxing with I thought it very much worth a share.
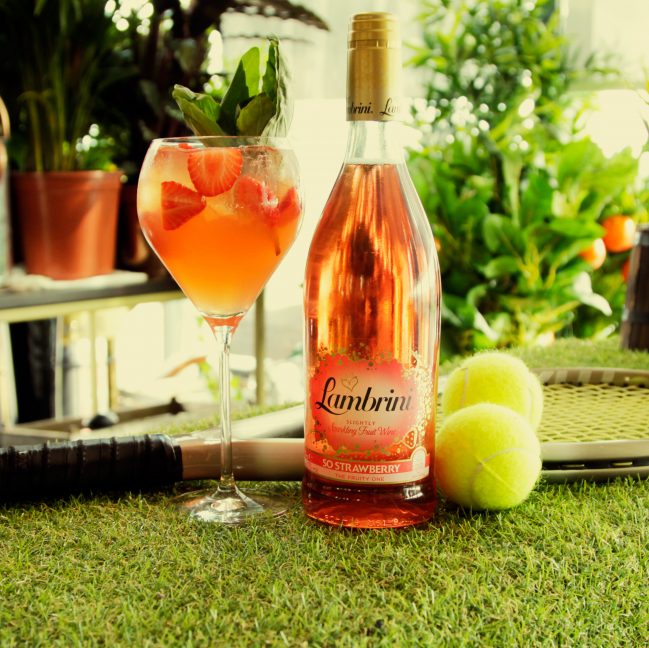
The cocktail, named the “Lambrini Deuce” features Lambrini So Strawberry (what else?) as it’s hero ingredient and combines gin with balsamic syrup- with a touch of basil to garnish. The gin is optional if you fancied a lower alcohol content tipple, or interchanged with other spirits. Being the gin fiend that I am though, when I do drink, I’ll be serving this up as suggested in the biggest wine goblet I can find!
Here’s how to make this perfect Summer drink:
1. Prepare the balsamic syrup. Mix one part balsamic vinegar to five parts granulated sugar – be sure to stir until dissolved.

2. Pour a small measure of gin (optional) over crushed ice, combining the balsamic syrup and lemon juice as you stir.

3. Take four strawberries, chopped into halves, and add them to the glass.

4. Top with Lambrini So Strawberry.

5. Gently stir and garnish with a couple sprigs of basil

All you need then is a group of your best girl pals, ready to sit back, relax and enjoy the on court action (with buckets of strawberries and cream to snack on, naturally.

end

Experiments in baking: Protein Muffins

Not only have I not done a baking post in forever, it has been ages since I last did any baking in general let alone try anything new. My work/life balance hasn’t been in my favour when it comes to getting time in the kitchen, so when myprotein got in touch I was determined to take advantage of the chance to try out some new ingredients.
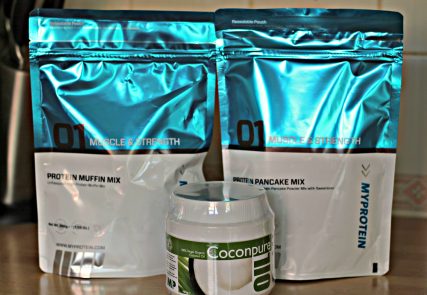
Protein has become a bit of a buzz word in the baking world with it cropping up in all manner of recipes. It’s perfect as high energy boost for those with an active lifestyle and surprisingly makes for a versatile ingredient. I was sent a package of goodies which included coconut oil, a muffin mix, a pancake mix, a bag of whey powder and a bag of buckwheat flour. I wasn’t quite sure where to start but in the end I stayed semi-close to what I knew and went for the protein muffin mix for my first foray.
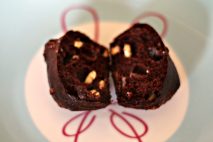
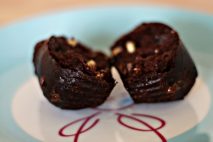
The mix I had was the 200g unflavoured pouch which yields enough to make 8 muffins, although I made mine smaller and got 12 from the mixture. To the powder I added 200ml milk, 4 tbsp coconut oil (something I had read ALL about yet never used), 3 tbsp cocoa powder and a bag of white chocolate chunks- not brilliant for a health food and I could have gone all out with fruit and nuts but a girl needs her chocolate fix from time to time (or all the time!). If you didn’t want or need 8/12 muffins you could just use half of the mixture as the pouch seals up easily to keep the mix fresh.

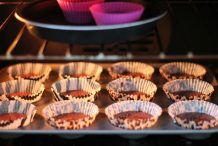
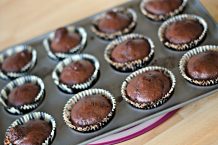
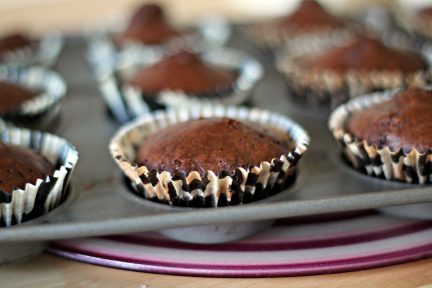
After a quick mix up in a bowl the muffins took only 12 minutes in the oven at 190*c before they were ready to go. I wasn’t too sure what to expect, and mine were a little burnt on top thanks to our temperamental oven but these came out so soft and fluffy inside with a lovely texture. I won’t lie, you can taste that there is something “different” about these but if you are already used to protein enriched products you probably won’t notice it and I certainly had no issue with it- neither did the other people in and around the house who I asked to sample these, they aren’t an every day snack, but if you know you’ve got a jam packed few days coming up or have some lovely long hikes/cycles/runs coming up with Spring sunshine then these would make a perfect portable snack or recovery food once home.

For me they are a quick and easy way to get some calories and nutrition in, and whilst it’s an expensive way to bake I can see myself purchasing a mix or two every now and again just to keep in.

Stay tuned for the next instalment in my baking adventures; which ingredient would you like to see me use next and do you have any recipe suggestions?

Have you ever tried baking with protein powders and mixes? How did you find it?

end